Friday, May 31, 2013

DIY Window Pane Mirror


I recently updated the master bedroom but the wall above the dresser was just missing something.... wouldnt you agree?


We still had our old mirror as seen on the right side in the picture below....


So we decided to give it a new look. First we removed the filligree design (I think that it was it is called), cut off the curved portion of the wood so that we had a rectangle frame. I painted it white and then distressed it some. We cut a piece of 1x6 pine to fit the width of the mirror, stained it to match the rest of the furniture and attached it with a couple of nails and braces. I used some inexpensive wooden trim cut to size to create the "window panes" and then added some aged hardware pulls just to give it a little more character. I still need to make a cute vintage wooden sign to sit on the top shelf between the little milk cans/candle holders.


So a couple of weeks have passed and I felt that the mirror aka window frame needed something on the shelf between the 2 mini milkcan/ candle holders. We had some leftover wood from the wood used to make the shelf, so I painted it to look like an aged vintage sign.


Sunday, May 19, 2013

Enamelware Pot & Baskets

These are just a few items that I found. The enamelware pot was from the antique mall, and of course I had to fill it with hydrangeas. I thought the baskets were cute so I filled them with magazines and pinecones.


Updated Master Bedroom

So the last few weekends have been spent overhauling our existing bedroom furniture to give it a new look.


Here it is after adding the headboard. I just used pine board stained a dark espresso and tacked to the wall.


The old furniture was a honey colored pine and the walls were a mustard type of yellow. Since I am going for the weathered farmhouse style (not too weathered to keep my hubby sane) I decided to stain the top and paint the rest white with just a small amount of distressing.


 Excuse the treadmill. I dont have any other place to keep it for now.


Some crates from Michaels are painted and stacked to create storage. I also found several baskets from Goodwill and spray painted them to match.

The curtain rod is a piece of pvc pipe spray painted a dark brown and then I hot glued some old finials on each side.


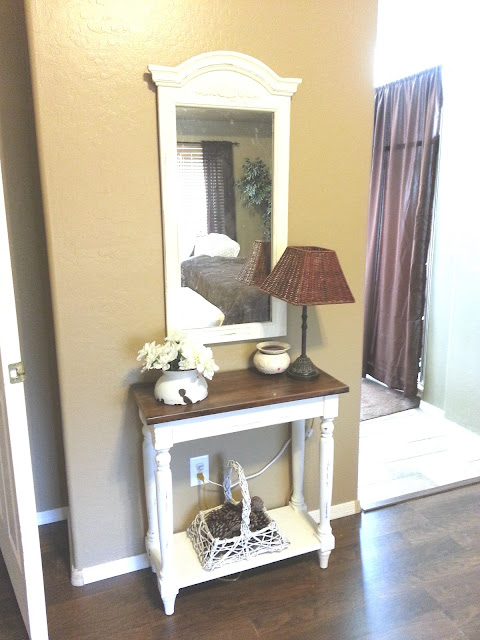
I found the cute little enamelware bowl from the antique mall and added a few flowers from the dollar store. I think the enamelware bowl is actuall an old spitoon... eewwwhhh... I also found the lamp shade and the cool white basket from Goodwill. I have a large collection of pinecones so I just added some of those to the basket.

This lantern was made from old picture frames, a couple of pieces of mdf board painted painted to match and some hot glue. Since I am going for the aged look, the imperfections fit right in.


I found this old tin bucket at the antique mall so I just glued a bit of burlap and added a muslin bow and called it a day...

This is another metal container found at good will with a piece of burlap attached. I may paint "MILK" on it or something like that. The "milk" bottles are just frappucinno bottles from Starbucks. I removed the labels and coated the inside of the bottle with white craft paint and painted the tops to look like metal. I also found the white urn at a thrift store and just added some greenery and moss.


More baskets found at a thrift store painted brown, and a dear friend found this white pitcher for me at the antique mall. I found the enamelware bowl and set the pitcher in it.

I found these cute little milk cans at another thriftstore (gotta love those thriftstores) and turned them into candle holders. The picture below shows the before. 


Here is the before.... they were cookie tins.


This is a before picture of the bedroom furniture 

And another picture of the old bedroom.... I like it so much better now.

Vintage Milk Can

I have been on the search for a vintage milk can for quite some time. I have found several but they are pricey, so I kept searching. I finally found one at a local antique mall for $27. I didnt think that was a bad price considering most of them were going for anywhere from $60 and up.

This one wasnt the prettiest. It was painted a pukey peach color that just wasnt my style. So I scoured through Pinterest to get ideas and came across an idea that I really liked and I decided to borrow her idea. I reviewed her blog/tutorial and got to work.

It turned out great, but I can not take the credit for this idea....


The first step was to cover up the peach with a dark brown. I made sure to leave the natural rust at the bottom.


Then I painted over the brown (using a homemade version of chalk paint - craft paint + plaster of paris + water) with an off white paint. I wanted to be able to sand off some of the white once I was completed.


The next step was to print out the design that I wanted. After printing it out I used a charcoal pencil to color the backside of the paper. Then the paper was taped to the can and I traced over the design. By doing this, the design is transferred lightly onto the can. Once that was done I painted the design. Here it is before I distressed it.


The next step was to distress the print to give the aged look. I just took a piece of sand paper and started going over the design.


Just add some hydrangeas and a little burlap, and here is the finished product.......